
This blog post is a bit delayed, but we finally have some new floors to rave about! Years after moving - far more than expected - we finally ditched the old teal green carpeting and now have some wonderful stained floors in the home.
With the help of our friends at Green Home Experts, we tried several different color samples of a product called Rubio Monocoat. This is a single-application floor stain and finish that does a fantastic job of making the floors in our house pop like never before. Best of all, the product doesn't have any noxious off-gassing like traditional polyurethane, and it has no harmful chemicals.
We went with Rubio's color "Black." I know what you're thinking, "Who wants black floors?!?" but the reality is this doesn't paint the entire floor black, it ends up staining the wood grain black and the surface of the wood a rich dark color. Just see the closeup on Rubio's web site to see what I'm talking about. The oil was applied by hand along the room edge and then with a floor buffer throughout the rest of the floor to give a nice finish. Working with the product is a little different as you need to work in an area within 15 minutes so the oil doesn't dry too much. But there is just one application of the oil that is needed.
 Usually there are no repeat visits, but we learned a lesson on this. You see, the paint turned out so nice in the Living Room that we decided to the Dining room too after the floors were done. Learn your lesson here from our mistake: No matter what you do and how tempted you are, wait until EVERYTHING else is done before finishing floors.
Because Rubio Monocoat is a natural oil it takes a while to dry. It needs 36 hours of drytime to be walkable, and three weeks to fully cure and dry out. The painting and sanding required in the dining room ended up getting dust into the crevices of the not-quite-dried floors, resulting in a hazy finish. But a few drops of oil on a floor buffer corrected the issue. The bad part is it required another 36 dry time and cure time.
Overall though we are quite happy with the way things turned out. In fact the color matched the floor trim very well, and made the built-in trim and mantel appear a bit too muted, so I grabbed an old cloth and some linseed oil and cleaned up the existing wood too so everything now has a nice rich luster. I also debated stripping the old paint off the fireplace, but time is a luxury right now, so we put a coat of a nice rich gray over the painfully boring white, which blends in nicely with the new green-blue walls and dark floors. And, until some other thing strikes our fancy, I think we can call this room "done!" For the time being.
Tuesday, June 14, 2011
Finished Floors!
Thursday, May 19, 2011
Finally Redecorating the Living Room
In our remodeling journey, the overall motivation here is to refinish the floors before baby comes and soon begins crawling on them, but first, we have to fix the walls and ceiling and paint them. You see, the living room has been left mostly how we found it upon taking ownership of Humphrey House. There have been a few small changes, but nothing major. There were however several things needed:
- We had long ago removed an air duct due to structural concerns, but never patched the hole.
- The thermostat needed moved out of our dining room into the living room
- The ceiling needed some serious patch attention after a work above
- We never were able to insulate above/below the bay windows (finished a day ago).

Deciding on paint was an interesting experiment that involved many trips to our local Benjamin Moore store for samples. It was interesting to learn that they are slowly phasing out all high-VOC paints, so all of their paints for indoor use will soon be low or zero-VOC. We will be using the Benjamin Moore Natura line which is zero-VOC paint to keep our indoor air healthy, especially with a pregnant woman in the house. But we eventually settled on a color called Silver Minx for the walls in the Living Room.
Brandon's crew came and did some great work, and painted the ceiling a flat white, the ceiling trim (already painted) a semi-gloss white, and the walls the green/blue. Someday it would be nice to strip the crown molding in this room down to the original wood and refinish it, but now is not the time so we reluctantly added another layer of paint to it.
The wall paint color is interesting - it appears light blue in daylight, but changes to light green at night. Pretty neat.


In this last photo, you can compare the wall on the left with the first photo in this post above and see that the gaping hole where an air duct used to be is now patched in. I actually spent an evening using SOY-Gel stripper
At long last, the Living Room is ready for the finish flooring.
Wednesday, May 18, 2011
The Whirlwind Continues with Flooring
Yes, getting ready for baby is in full swing here at Humphrey House, which means any activity that may cause or contribute to creating dust needs to be done NOW before baby comes and is soon crawling around licking the floors.
So the next rooms on our whirlwind finishing of Humphrey House is to tackle the Living Room and Dining Room. Sustain-a-building came out and helped us once again by insulating the walls with blown-in cellulose above and below the massive 10-foot wide bay window in the living room. This area always gets so cold in winter time and having something in the walls other than the dead air space that has been there for the last 100 years will certainly help.
In the photo below, you can see the holes cored to blow in the cellulose insulation above and below the bay windows, and also Cosmo kitty saying goodbye to carpet.
 The carpet that the home's PO had installed before we moved in finally had to go. We have effectively treated this carpet like a dropcloth for years, knowing that someday we would be taking it up and refinishing the beautiful hardwood floors beneath. Well, no time like the present!
Pulling up a seam in a high traffic area near the hallway, we found that the floors underneath look to be in remarkably good condition. I expected to find a clawed, scratched floor similar to the maple that was in the kitchen, but no, these were in great shape.
Oh well, we had already decided to sand them down anyway, so out with the old!


Once the old surface was sanded, we got to see some gorgeous graining in the floors. These are super nice and we are very fortunate to have them in such good condition after a century. It looked like this was just the first time they had been sanded too! Hopefully you get an idea of the grain from the closeup below (Bonus points for anyone who IDs the book Jen chose to block off the heat duct).

The grain will show up nicely as we're planning on a dark finish of Rubio Monocoat, a product which actually penetrates and bonds with the wood to create a durable surface. From the manufacturer, "Monocoat all-natural oil wood floor finishes are plant-based, VOC-free and completely non-toxic oil finishes of extraordinary durability."
But first, we need to have Sustain-a-building come and paint!
Tuesday, May 17, 2011
These are Some Serious Windows
Working in the field of green homes is both a blessing and a bit of a curse. It's great to establish contacts with people that understand healthy indoor air and energy efficiency, but when you live in a 1920's house you realize there are a lot of improvements that can be made.
One thing we had done a few years ago when we finished our second floor was install some storm windows on the original windows in the master bedroom as I really liked the vintage glass and look. The storm windows helped a bit, but after several winters sleeping next to this cold surface, it quickly became apparent that we had to look for something that would perform better and be more comfortable for us. Especially since the windows take up the majority of the wall. So not only did we want comfort, but if I was going to buy windows, I want the best performing windows I can get while still keeping the historic look of the front facade of our home.
I spoke with Andy Scott from Energistics, who is both an energy rater (building science specialist) as well as a distributor for Serious Windows,. Who better to advise than someone who has the tools and training to make informed decisions about building performance? Andy helped me get the remodel-friendly and affordable vinyl option (Series 501) with mullions that divide the top sash into three panes of glass to help keep the historic look.
What makes these windows particularly good is a suspended film in the glass that helps reflect back unwanted heat from the sun - an important issue that is usually difficult to control for West-facing windows receiving afternoon heat. The windows have a U-value of 0.21, which means there R-value is 4.75 (1 divided by U-value = R-value). Even though they are vinyl, the frames are very well insulated (rare for vinyl windows). This is very good for a window. Since we were adding windows, I also had Sustain-a-building install these windows. When removing the old windows, they took advantage of the work to dense-pack cellulose above and below the windows to help keep the room even more comfortable. It still amazes me that most homes built in the 1920's do not have insulation - energy must have been very cheap back then! Before installing trim, the guys used Great Stuff Window And Door Foam
 around the seams to ensure a good airtight seal.
We also recreated the craftsman-style built-up trim / crown molding used on our kitchen remodel and the nursery trim so the house has some good continuity now. Here's a nice detail shot for you trim aficionados: The trim pretty much consists of 1 x 4's. The top casing piece has a small bullnose addition that wraps the 1x4, and then the addition of a crown molding piece above. A flat 1x3 caps off the crown for the finished look.
And the result if we take a step back in the room and admire the work? Absolutely stunning. We may not even get curtains (just shades) since this looks so good!
From outside, the windows are bit brighter than the "Craftsman tan" paint we used on the windows on the front porch so they do jump out a bit. I haven't yet decided if its worth painting the new vinyl to match or not, but for now its much better than the older brown that just looked like the windows faded into a black hole. The view from the street certainly looks much better, and I know we're going to be very comfortable next winter thanks to our Serious Windows!
Monday, May 16, 2011
'Bout Time you Finished Those Windows!
Windows (and more specifically, window trim) has been one of the luxuries we were willing to live without when we finished our second floor a few years ago. We always intended to do it, but we just needed to move upstairs first. Then, a few years passed.
There's nothing like a deadline to get things done though, is there? Beginning with the nursery, we finally got some trim going. The first step was staining the windows themselves. This was much more difficult than I had expected, and took nearly an entire day to stain and then use 2 coats of sealer. So many small parts and angles! Of course, we used Water-based stain and sealer as they have much less emissions, and okay for Jen to breathe.
For the window trim, I wanted to recreate the arts and crafts look that is present throughout the rest of the house, so we used a similar craftsman-style built-up trim / crown molding for the nursery trim. Jen quickly began nesting, but you can see a nice detail of the finish result in the photo below:
We definitely needed help with this and other projects we'll be posting about soon, so I called on my good friend and one of Chicagoland's leading Green builders, Brandon Weiss of Sustain-a-building to help us get things done in a quality, sustainable manner. His expert carpenter made quick work of the window trim, which needed a bit extra detail in the form of a 3/8" jamb extension.
Finishing the trim wrapped up the construction work needed for the nursery, and Jen quickly descended into nesting mode. For those wondering about the nursery decor, we sort of have a playful take on Alice in Wonderland going on. I'm sure we (ahem, Jen) will be able to post more about that later. But one thing that is gleaming in the corner there is a wonderful bunny light gifted to us by the good folks at Square 1 Precision Lighting, makers of some of the best energy-efficient lighting out there (yes, better than LEDs). Here is the bunny in all his glory, chasing his stopwatch in the shadows:
Wednesday, April 27, 2011
Paint can be Non-toxic
We have some very good news to share - our home will soon be a little fuller this summer as we welcome a newborn to the family. So at Humphrey House we've begun what will soon become a flurry of activity preparing for baby.
One of the first things to tackle was the room we'll be using as the nursery, which is one of the two bedrooms in our converted attic. This former guest bedroom needs a makeover - and finished off (windows were never stained or trimmed!). Nothing motivates you to finish a punchlist quite like a deadline. I had to first actually finish mudding and taping the drywall around the windows (which had never been done and for three years has been craftily covered by curtains).
Once the walls were ready, we naturally wanted to paint and found that we are definitely trying to create a safe healthy room, so when evaluating options, we went beyond "typical" green paints that focus on low emitting levels of VOC's (volatile organic compounds). These VOCs can be very harmful to human health. We have been using Low-VOC paints before for our kitchen remodel, but with a newborn that takes many more breaths than an adult, we wanted something as safe as possible. The fact is, most low-VOC paints still are toxic. So we decided to go with a paint that not only has low VOC emissions, but also is made from non-toxic materials, called AFM Safecoat - which also does not have any formaldehyde. It was $10 more for a gallon than regular paint (we needed just one gallon). Is it worth an extra ten bucks to know the air is free from formaldehyde and other toxins, less likely to cause chemical sensitivities and asthma in our baby? Yes. I see this decision as very cheap insurance.

We went with a nice bluish-purple for the walls that Jen likes to call a "shade of periwinkle". I like the color selection because this particular color looks different in daylight vs artificial light so gives some variety to the room. In terms of installation, the AFM Safecoat paint does roll on the walls a bit differently - a bit more loosely and not as firm. So it take a bit more effort to apply. It also was pretty thin on the first coat, but incredibly deep after two coats. Jen was quite happy to see the "old" (a mere 4 years) yellow walls go away.
It's worth noting that just because it is non-toxic low-emitting paint doesn't mean it is low emitting before it is dry. There is an odor that is less offensive than regular paint, but still noticeable for a few days as the paint cures. But now it's virtually undetectable.
Next, we'll have to tackle the windows in this room which have been unstained / unpainted for nearly four years(!) and then trimmed out. Then we'll be ready for some nursery furniture! But of course the impending arrival of the baby means its time to polish off several other items on the wishlist punch list, so there will be more to follow.
Wednesday, April 13, 2011
Purifying our Water
Water is something many of us take for granted. Although we try to conserve and minimize our impact with efficient fixtures and rain barrels, it's not always easy. Partly because we live 10 miles from one of the greatest resources of freshwater in the world.
However, there are increasing reports of contamination in Lake Michigan. Since our tap water comes from the lake, hearing about the rising levels of Fluoride and Chromium-6 (the villain in Erin Brockovich's story) concerned me. What effects would this and other contaminants have on our family's health? Why isn't testing for a probable carcinogen (i.e. cancer-causing substance) mandatory for our water? Well not being one to wait for the wheels of bureaucracy to resolve this public health issue, I began looking for a water purification system.
After a bit of research, it seems a Reverse Osmosis (RO) water treatment system is really the best assurance for having pure water. So for the holidays, we bought one for Humphrey House. It took awhile for things to settle down so I could install it - and even longer to write a post about this.
The RO system involves an extra faucet near your kitchen sink, and a lot of room in the cabinet underneath it. We went with a Watts reverse osmosis system.
Installing it into our Zodiaq counters could have been quite difficult, but we had four holes already drilled - one for the main kitchen sink faucet, one for the handle, one for a pullout sprayer, and one for a soap dispenser. We decided we could ditch the soap dispenser and put the special RO faucet in its place, so that saved a lot of work.
Otherwise, installation was pretty straightforward. One of the more challenging aspects was to try and find room under the sink for everything since we have two bowls (which means two drains), a dishwasher line, and a garbage disposal under there already. The RO system consists of a filter unit and a large storage tank. The tank is needed because it takes some time to filter the water properly, so you need to store the treated water so when you turn on the faucet there is enough ready to come out. It took some playing around to see what configuration would leave us with at least some storage room under the sink. I finally decided that centering the tank behind the center column would work best. The filter system nicely attached to the wall of the cabinet, so we can slide sponges or towels underneath if we need to. But as you can see from the photos, it's pretty tight down there!
This actually gave us a good opportunity to purge many of our toxic cleaning products that had been stored down there and keep them out of way from little hands. We recently got a Activeion ionator HOM Portable Cleaner and Sanitizer which permanently replaces the need for most chemical cleaners anyway, so the timing was perfect.
Anyway, now if we want some clean fresh water, we simply have to lift the handle on the special RO faucet (on the left in the photo below) and out it comes!
There were some gurgling drain noises made by the system as it filled up the first time and was used for the first week or two, but now it has quieted down and is unnoticeable when its refilling the storage tank.
The best part about this is the lack of any odor from the treated water, and the simply pure taste. I swear once you try this and then try tap water you will notice the taste and smell and appreciate your reverse osmosis system when you come home. I know we do!
Monday, March 28, 2011
Foundation Insulation Panels
 Anyway, we did this installation during the winter months while plants were still dormant so there would be less trampling and damage to what little landscaping we have along the sides of our home. The panels were installed in early January, and made a pretty noticeable difference as the finished basement is no longer nearly as cold as it used to be, which makes sense. If you house loses heat at the same rate (heat moves from warm to cold), if your entire house is insulated everywhere except the basement, your heating dollars are going to heat the Earth as much if not more than your home.
After the project was completed, we started to have spring come and you can see things are blooming despite the fact that there was a lot of traffic and digging overwinter.

The only thing left will be to take some of the remnant pieces and scrape of the sand which I will again attempt to caulk into the seams to make everything appear continuous. In the meantime, we're enjoying a much more comfortable and cozy basement!
Wednesday, February 02, 2011
Photos of Chicago's Blizzard of '11
At Humphrey House, it's been a relatively uneventful winter - until today. At about 2:30 AM yesterday Feb 1, we started getting snow and howling winds (40-50 mph) and it didn't let up until 10:00AM today. When it was all over, it was the third-snowiest day on record with 20.2" totals. However, due to the high winds, there is hardly any snow on the roofs of any buildings - it all was blown onto the ground creating massive drifts.

...and the winds had caked the front windows. Cosmo kitty says, "I wanna play out there!"

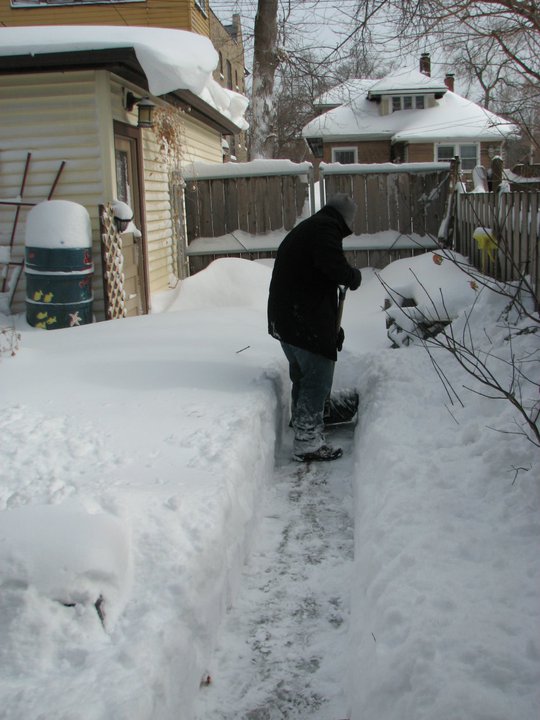
By noon, the snow had left and we ventured outside to find the backyard resembling a snowsea with frozen waves and currents.

Time to shovel a path. We went to the garage first so I could get a yardstick.
Overhanging the entrance door to the garage we discovered there was a new awning, perhaps put there to protect us from the elements?

The drywall T-square was the perfect device to plop in various places to judge the depth of the snow. No, your eyes aren't deceiving you - half of the four-foot tool is missing as the snow in the middle of the yard was 22" deep.

During the winds last night, we heard a clanging in the upper bedroom in back of the house. I had a sneaking suspicion some roofing material was loose. Turns out, it was the aluminum drip-edge that goes under the shingles to keep out wind-driven rain. methinks this may not be repaired for awhile.

Venturing out the front door we found a massive snow drift that had formed from the winds that were howling down the 10-foot canyon of space between our home and our neighbors home. A slight breeze made snow pick up and dance over the edge of this drift as if it were a desert sand dune.
Humphrey House from the street which had been plowed. Notice the massive drift on the roof of the front porch, nearly covering up the bedroom windows.

The view of our street. All pedestrians used the street for walking, and there were actually quite a few folks out today surveying the neighborhood.
Of course, what's the use in living in the snowbelt if you can't have a little fun every now and then. As Jen took this there was a distinct "Don't You Dare!!" that gave me pause from throwing the snowball.


