Showing posts with label painting. Show all posts

Thursday, May 19, 2011

Finally Redecorating the Living Room

In our remodeling journey, the overall motivation here is to refinish the floors before baby comes and soon begins crawling on them, but first, we have to fix the walls and ceiling and paint them. You see, the living room has been left mostly how we found it upon taking ownership of Humphrey House. There have been a few small changes, but nothing major. There were however several things needed:

  • We had long ago removed an air duct due to structural concerns, but never patched the hole.
  • The thermostat needed moved out of our dining room into the living room
  • The ceiling needed some serious patch attention after a work above
  • We never were able to insulate above/below the bay windows (finished a day ago).
The floors turned out to be in great shape, and before the final coat was applied, we had Sustain-a-building come back and repair the walls and ceiling, patch, prime, and paint them.

Deciding on paint was an interesting experiment that involved many trips to our local Benjamin Moore store for samples. It was interesting to learn that they are slowly phasing out all high-VOC paints, so all of their paints for indoor use will soon be low or zero-VOC. We will be using the Benjamin Moore Natura line which is zero-VOC paint to keep our indoor air healthy, especially with a pregnant woman in the house. But we eventually settled on a color called Silver Minx for the walls in the Living Room.

Brandon's crew came and did some great work, and painted the ceiling a flat white, the ceiling trim (already painted) a semi-gloss white, and the walls the green/blue. Someday it would be nice to strip the crown molding in this room down to the original wood and refinish it, but now is not the time so we reluctantly added another layer of paint to it.

The wall paint color is interesting - it appears light blue in daylight, but changes to light green at night. Pretty neat.


In this last photo, you can compare the wall on the left with the first photo in this post above and see that the gaping hole where an air duct used to be is now patched in. I actually spent an evening using SOY-Gel stripper, a nice product that performed well. I had some pieces of matching trim from the old kitchen in the garage (thank god I saved them). One coat of the stripper and a few hours later, the layers of paint easily came off. It still took a fair amount of time to scrape the boards in detail and clean them to be stained, but this made patching the wood where the air duct used to be pretty easy for the Sustain-a-building crew.

At long last, the Living Room is ready for the finish flooring.

Wednesday, May 18, 2011

The Whirlwind Continues with Flooring

Yes, getting ready for baby is in full swing here at Humphrey House, which means any activity that may cause or contribute to creating dust needs to be done NOW before baby comes and is soon crawling around licking the floors.

So the next rooms on our whirlwind finishing of Humphrey House is to tackle the Living Room and Dining Room. Sustain-a-building came out and helped us once again by insulating the walls with blown-in cellulose above and below the massive 10-foot wide bay window in the living room. This area always gets so cold in winter time and having something in the walls other than the dead air space that has been there for the last 100 years will certainly help.

In the photo below, you can see the holes cored to blow in the cellulose insulation above and below the bay windows, and also Cosmo kitty saying goodbye to carpet.

The carpet that the home's PO had installed before we moved in finally had to go. We have effectively treated this carpet like a dropcloth for years, knowing that someday we would be taking it up and refinishing the beautiful hardwood floors beneath. Well, no time like the present!

Pulling up a seam in a high traffic area near the hallway, we found that the floors underneath look to be in remarkably good condition. I expected to find a clawed, scratched floor similar to the maple that was in the kitchen, but no, these were in great shape.

Oh well, we had already decided to sand them down anyway, so out with the old!


Once the old surface was sanded, we got to see some gorgeous graining in the floors. These are super nice and we are very fortunate to have them in such good condition after a century. It looked like this was just the first time they had been sanded too! Hopefully you get an idea of the grain from the closeup below (Bonus points for anyone who IDs the book Jen chose to block off the heat duct).

The grain will show up nicely as we're planning on a dark finish of Rubio Monocoat, a product which actually penetrates and bonds with the wood to create a durable surface. From the manufacturer, "Monocoat all-natural oil wood floor finishes are plant-based, VOC-free and completely non-toxic oil finishes of extraordinary durability."

But first, we need to have Sustain-a-building come and paint!

Wednesday, April 27, 2011

Paint can be Non-toxic

We have some very good news to share - our home will soon be a little fuller this summer as we welcome a newborn to the family. So at Humphrey House we've begun what will soon become a flurry of activity preparing for baby.

One of the first things to tackle was the room we'll be using as the nursery, which is one of the two bedrooms in our converted attic. This former guest bedroom needs a makeover - and finished off (windows were never stained or trimmed!). Nothing motivates you to finish a punchlist quite like a deadline. I had to first actually finish mudding and taping the drywall around the windows (which had never been done and for three years has been craftily covered by curtains).

Once the walls were ready, we naturally wanted to paint and found that we are definitely trying to create a safe healthy room, so when evaluating options, we went beyond "typical" green paints that focus on low emitting levels of VOC's (volatile organic compounds). These VOCs can be very harmful to human health. We have been using Low-VOC paints before for our kitchen remodel, but with a newborn that takes many more breaths than an adult, we wanted something as safe as possible. The fact is, most low-VOC paints still are toxic. So we decided to go with a paint that not only has low VOC emissions, but also is made from non-toxic materials, called AFM Safecoat - which also does not have any formaldehyde. It was $10 more for a gallon than regular paint (we needed just one gallon). Is it worth an extra ten bucks to know the air is free from formaldehyde and other toxins, less likely to cause chemical sensitivities and asthma in our baby? Yes. I see this decision as very cheap insurance.


We went with a nice bluish-purple for the walls that Jen likes to call a "shade of periwinkle". I like the color selection because this particular color looks different in daylight vs artificial light so gives some variety to the room. In terms of installation, the AFM Safecoat paint does roll on the walls a bit differently - a bit more loosely and not as firm. So it take a bit more effort to apply. It also was pretty thin on the first coat, but incredibly deep after two coats. Jen was quite happy to see the "old" (a mere 4 years) yellow walls go away.

It's worth noting that just because it is non-toxic low-emitting paint doesn't mean it is low emitting before it is dry. There is an odor that is less offensive than regular paint, but still noticeable for a few days as the paint cures. But now it's virtually undetectable.

Next, we'll have to tackle the windows in this room which have been unstained / unpainted for nearly four years(!) and then trimmed out. Then we'll be ready for some nursery furniture! But of course the impending arrival of the baby means its time to polish off several other items on the wishlist punch list, so there will be more to follow.

Wednesday, July 28, 2010

Despite Heavy Rains, Block Party Goes On

Last weekend, our annual block party was scheduled. We had a hand in helping organize a few events and were excited as our niece and nephew were coming over to join the fun.

However, heavy rains Friday night and Saturday morning threatened to put an end to this. We received 8+ inches of rain which contributed to I-290 being shut down for the first time ever due to the new river that formed beside it. In fact, our town was declared a disaster zone and received the highest rainfall in the Chicagoland area.

We and others on our block were fortunate to only receive a little minor water in the basement, unlike some friends who received much worse damage. But despite this rain delay, folks on our block decided to press on with the block party.

After a social breakfast, the main activity of the day was painting rain barrels. While I may have had a part in suggesting the activity, it was well-coordinated by another member of our block, who took some photos of the process. Those of us interested chipped in on paint and supplies ahead of time, and we ended up with 6 rain barrels painted by different families on the block. The kids got into the painting at first, but quickly lost interest when bubbles and water balloons started flying around, so the adults ended up completing the barrels.


For our part, we took one of our existing rain barrels and painted a playful underwater sea scene on it. Jen had some great inspiring artwork for a whimsical octopus, puffer fish, jellyfish, and more that she printed off in advance. We painted directly onto the barrel and protected it with a coat of polyurethane. We're thinking about installing our barrel off the garage beside the vegetable garden, where it can give a lot of life and color year-round.


Another fun activity I was in charge of was the Blender Bike. Our friend Jim works with the good folks at Working Bikes and loaned me an old exercise bike fitted with a DC motor that could power a lightbulb. It could also power an old school blender, so with a bit of ice and some Countrytime lemonade mix, the kids on our block got a first-hand feel for energy. I would have them pedal and get a good speed going on the exercise bike, and then flip the blender switch to on. They would immediately feel the "electrical load" and have to pedal much harder to keep it turning. It worked out great and with the heat and humidity, the kids lined up for an ice cold slushie! Especially the ones who were pedaling to power the blender.

The party really started a bit later, when I offered all the adults to make a slushie with vodka in it. Lots of takers for that!

I also brought out our baggo boards and had borrowed a really neat set from Chris to have a baggo tournament (with a 16-team bracket). This has become a good block party tradition. We had some good teams this year, and I think we'll do some seeding for next year's party.


Finally, I collected electronic waste (e-waste) from people as usual to take for proper recycling. There's a Green Fest in Elmhurst this weekend that will be a perfect drop-off.

We skipped the evening communal dinner in order to spend time with our niece and nephew, but I think the block party was great fun on an otherwise wet day. It's always great to come together and strengthen the community.

"On this shrunken globe, men can no longer live as strangers," Aldai E. Stevenson

Monday, September 21, 2009

The Great Paint Exchange

Twice a year, our city's public works department holds an event called the Great Paint Exchange. This basically is an event for people to dispose of unused paint, as well as for others to go and obtain free paint. It takes place in the first public works building in the country to earn a LEED Gold rating.

It's really a simple idea. In the morning, people are invited to come turn in all those partially-filled paint cans sitting in their garage or basement. Since latex paint in liquid form can pose environmental contamination issues if thrown into a landfill, this gives people a way to responsibly get rid of their old paint. It's also an excuse for people like me who have far too much paint "collected" from too many projects.


After the 2-hour drop-off window closes, the Public Works people go through all the cans and decide which paint is salvageable. They then reopen the doors in the afternoon allowing anyone to come by and pick up cans of paint - for free!

This is a great example of something that has triple bottom line benefits - helping people, the planet (by diverting waste), and profit (free paint). I wish every city was this proactive and offered these kind of services. Maybe you can talk your city into hosting one! As for me personally, I was happy to be donating 9 cans of paint to those who may not otherwise be able to afford it. And it was a great excuse to carve out some shelf space in the basement.

Thursday, June 19, 2008

Our Painting's Time has Come

Last week we received a letter we'd been dreading for awhile. Our village has a Property Standards department, and every few years they take a "neighborhood walk" and cite homes that are in violation of miscellaneous dangers such as missing downspouts, rotted wood, missing handrails, garages in need of repair, missing address numbers, and improper parking surfaces (e.g. your lawn).

Well, what did they find when they came around to Humphrey House? A Violation waiting to happen! Yes, our poor, hapless paint has seen much better days. While I don't have any closeup photos of our currently dire straits, there are many posts from the past with photos that give you an idea. We've known all along that painting was going to be inevitable - Jen even created some super neat color scheme ideas when we first moved in. But now its official:

"Scrape/paint the wood members on the home, fascia, soffit, trim, and front entrance. Reinspection: August"
Gulp. So now its back to the color drawing board. In fact we ordered a book specifically focused on bungalow exterior colors. This looks like an involved project with a quick timeline, and we may have to call in some professionals. Maybe we can even find some stucco-friendly and eco-friendly exterior paints for Humphrey House's facelift.

Monday, April 21, 2008

Bathroom in a Weekend - Part 2: Walls

Although the first floor bathroom had been remodeled before we moved in (indeed, it was redone between the first time Jen saw the house and the first time I saw it), during the three-year mayhem of construction at Humphrey House, it had sorely deteriorated.

Once we uncovered the cool original bungalow floors and decided to go with them, we knew it was time to tackle the walls. I had previously repainted the ceiling and while I had the setup ready for the kitchen ceiling, but the walls had seen many patched holes that I later spot primed, and needed a fresh coat throughout. Well, they got four.

On Saturday, I began with a thorough coat of moisture resistant primer (this is a bathroom with no ventilation fan after all). After letting it set overnight, it was time to tackle the finishing coat. Scott, being the sport he is, offered to help paint before he had some other things to do.

Since the first floor bathroom is such a small room, we planned to reuse some of the myriad gallons of previously used paint that still had some left inside (about 15 cans or so). Jen thought a nice cool white would work well on the walls, so we went with Swiss Mocha leftover from the upstairs painting. So Scott and I cracked open an extra gallon and went to town. It went pretty fast as I cut in and Scott followed me with the roller. Without a toilet or vanity in the room, there was actually a fair amount of space for us both to work in, and things went along smoothly.

Until Jen exclaimed, "Wait, that's too yellow!" Turns out we did not have Swiss Mocha (the mix label on top was too faded), but some kind of creamy yellow. Suddenly the cool bath became draped in muted yellow, that when seen against the pastel blue bathtub, left you feeling that all we need was a dash of pastel pink and we'd have a perfect room for a baby shower. Needless to say, the yellow was out. I didn't have the heart to do this while Scott was still over, so I waited until after he left to redo the paint in a whiter shade.

About two thirds of the way into the new paint color, I heard a voice from behind, "That's still not it." I incredulously turned around to see Jen frowning at the walls I had just painted.
"It's practically white! What are you talking about?"
"No, it's still too warm. I want this room to be cool."And she started to go into some design philosophy as I wondered what i would be like to not be married to a graphic designer.
"Okay, well what color do you like best?" I asked.
"The white that was in here this morning was nice," Jen replied.
"You mean the primer?"
"Yeah, whatever. That was cool. Get it, cool? Let's use that."

I got it all right. So, I went around the room yet again for the fourth time with the same color (primer) that I had used the first time that weekend. Fortunately this primer has a bit of a gloss to it so it will actually relatively easy to maintain. but going through the process certainly wasn't easy!

Friday, January 11, 2008

In Living Color

Jason's sister Jennifer and her boyfriend Bill offered us a fabulous gift for our 31st birthdays in 2007 - their time and energy to paint a room in our house (they run a small faux/mural/painting biz out of Aurora). So we went to work Friday morning with white primed walls and came home to lemon drop ceilings, svelte green walls and an empire gold nook! The colors look really fabulous together - I don't think it could be more perfect. Jenny and Bill did an amazing job - and they did all the cut-in by hand - no tape! Looks fantastic. They really did a lovely job.

There were some issues with the paint product we used for the empire gold nook - we had gotten dutch boy for that area and after three coats there is still some bleed through and the paint doesn't seem to stick to the walls. Bill said it's not unheard of to get a bad batch of paint, one that simply didn't get enough glue in the mixing process. Jay is going to go to Menard's to see if we can get a refund, and Bill offered to come back once we get different paint.

But in the meantime, it still really does look great. The colors blend so well, and you can tell it was done professionally versus me doing it. :) We plan on having Jenny & Bill back to do the hallway in a faux - should be a great cover for the several coats of painted-over wallpaper that's left the wall texture pretty rough, seamed and cracked. But with their able hands, I'm sure it will look awesome ...

I really am falling in love with this kitchen ... makes up for all the frustration I've been all stressed about lately with dear old Humphrey House. Feeling very ... attached.

:) Now we get ready for CABINETS!


Thursday, January 10, 2008

Color Me Svelte ...

Well, our kitchen, anyway. We finally settled on paint colors AND countertop choice - YAY! David Gulyas (see post below) brought over the complete Sherwin Williams collection for us to go through with large swatches for each, which was overwhelming but ultimately fun. David coached us through some good color selections. We went back and forth quite a bit, whittling it down to our final choices, but finally have a full palette for the kitchen. Check it out!


We ended up getting the paint matched elsewhere - SW is a little pricey for our dear little pocketbook. (Jay, wanna post about the horrors and the goods?) We're finishing priming this evening, and then Jason's sister graciously offered up her mad skills (and that of her beau) to paint on Friday, which means we'll be ready for hanging the cabinets this weekend! Things are finally coming together, and I just can't tell you how excited I am!!!!

Thursday, January 03, 2008

Countertops and Color Schemes

Let the kitchen decorating begin! Over the holidays we managed to get the walls up and prime them to be ready for decoration. We're currently having the original maple floors patched where the rooms were combined and refinished by the fine gents at Elm Floor from Elmwood Park who came highly recommended to us. That leaves us time to decide things that, in all honesty, should have probably been done a long time ago. Well, it was hard to visualize how the space and colors will be working together until we had a blank canvas.
While browsing many kitchen design photos, we noticed that light cabinetry generally is paired with dark countertops, and dark cabinetry generally has lighter countertops. Since we already have elected to go with dark cherry cabinets (currently taking up residence in our living room), we thought we were pretty well pigeoned into a light coutnertop. Besides, its a small space, and we didn't want too many dark colors to become overwhelming and claustrophobic. Another plus is that a lighter surface doesn't reveal how dirty they are as easily as dark surfaces (as we learned from having black appliances in our condo!), so we can wait longer before cleaning it!

We went to our local KDA and looked at some Zodiaq samples, and found a style called "Cappucino" that really was great against Cherry cabinets. I've succumbed to the fact that we simply don't have the budget to purchase IceStone counters, as much as I love the idea of having beer-bottle-based countertops. But Zodiaq is a great alternative that is still green, harder than granite, and requires almost no maintenance.

However, some darker (midtone?) counters, such as a rich green, end up looking really sharp with cherry cabinets. I mean REALLY sharp, as we found out by looking at the "Magellen Green" Zodiaq sample in the store. We didn't think much of this color by looking at the brochure (or web site for that matter), but this just proves that it is hard for the web or print to capture the look of these stone-ish counters, especially the abstract "sparkle factor" that Jen loves so much.


I think we've pretty much decided that it is down to these two counter colors. Kudos to Jen for the awesome mockups of our kitchen space with cabinet layouts with both counters done by hand in Adobe Illustrator. It's good to have a graphic designer in the family! Once we decide on the counters, we can figure out colors on the walls that will encapsulate them.

Tuesday, January 01, 2008

ringing in 2008


I've been down for the count for almost a week with some lousy virus, so Jason was stuck with the chore of priming the kitchen walls all by his lonesome on new year's eve. he finished with fifteen minutes to go!!!!

Tuesday, October 23, 2007

Product Review: EZ Clean Paint Brush

Background
A few weeks ago, houseblogs.net approached us to see if we would be interested in evaluating a product from an environmental perspective. There are so many companies out there "greenwashing" their products and services (such as GE's Ecoimagination) that it is sometimes hard to cut through some of the fluff to find a quality product.

While we at Humphrey House aren't professional experts by any means, we are probably a bit more knowledgeable of some green building practices than the typical DIY homeowner. Jay's involvement with the USGBC helps out a bit in that regard. So even though we aren't yet ready to paint our kitchen, we offered to give our two cents on the "green" concepts for this product.

Product
The product is the "EZ Clean Paint Brush", which essentially is a quality polyester bristle paintbrush. But this is not just any paintbrush, mind you. The brush's body has been ingeniously designed to allow water to flow through the handle, and out where the bristles are attached. The other end of the brush is threaded to attach to a utility sink or garden hose. The net result is that cleanup should only take "less than a minute" after a paint job.

Upon first seeing the name "EZ Clean", my initial impression was "great, here's another product hopping on the green bandwagon". But after reading the overview fact sheet claiming a clean brush in less than a minute (possibly 30 seconds!) I like the product in theory.

Conservation
Depending on the size of the brush (and how much paint as loaded up on it) I've found it usually takes me 5-10 minutes to clean out a standard brush after using it. The EZ Clean Paintbrush's claim to green-ness is based on its water conservation features.

So let's try some guess-timations to quantify this. Typically, an older utility sink faucet or hose bibb will deliver 2 to 4 gallons per minute (gpm) of water – new faucets are around 2 gpm or less. So if we find a happy medium and state that a typical utility sink has an average rate of 2.2 gpm, here are our calculations for total water used in cleanup:

EZ Clean Paint Brush: 2.2 gpm X 1 minute = 2.2 total gallons of water
Standard brush: 2.2 gpm x 7 minutes = 15.4 total gallons of water

Based on the many assumptions above, the EZ Clean uses 14.3% of the water during a typical paintbrush cleanup. So from a water conservation perspective, the EZ Clean wins all sustainability arguments.

Manufacturing and Waste
In a thorough sustainability mindset such as cradle-to-cradle, there are other "green" aspects to consider besides the obvious water conservation features. The manufacturer has designed this product to last a long time, and in doing so has chosen many synthetic materials. The energy used in the production of oil-based plastics and synthetic polymers is far greater than a traditional wood handled paint brush.

The manufacturing process for plastics and synthetic polymers is generally fraught with wasteful business practices, and the EZ Clean Paint Brush gives me no reason to think otherwise. While the "Made in China" label does not necessarily guarantee non-sustainable manufacturing practices (reference), it is not outside the realm of possibility.

The manufacturer does say the plastic body for the brush is recyclable. However, the user must clip off the bristles before recycling it with other plastics. On the other hand, since there are likely to be far more uses out of this paint brush than the standard paint brush, there is less waste generated over the lifetime of the building (or brush's owner).

Conclusion
Ultimately, I look forward to actually trying out the EZ Clean Paint Brush at Humphrey House. Water conservation is a growing concern (just ask anyone in Atlanta or California right now), and the potential reduction of water waste from this product is another drop in the bucket (sorry, couldnt' resist the pun). In spite of some of the manufacturing processes that were likely chosen to keep the final cost of this product low and affordable, I do look forward to spending less time at my sink massaging the bristles of the paint brush to get it as clean as possible. All in all this gives us yet another reason to getting our kitchen on track and ready for painting!

Wednesday, March 21, 2007

The Finished Wallspace

What do you get when you combine Shepherd's Pie, a comfy futon and an aunt who knows how to wield a fine art brush (besides one pissed off doggie in a cage?) A BEAUTIFULLY PAINTED UPSTAIRS, THAT'S WHAT! Thanks to my mom's sister, Linda Sue (alternately known as Aunt Linda, Aunt Suzie, and The Queen of the Dolls), our upstairs boudoir is AMAZING. I mean really really lovely. She painted it so well. Using my fine art brushes from Jen's Non-Digital Art Period of 2003 (love to see that scene make a comeback after the house is done), Aunt Suzie turned my sloppy cut-ins on the Pebble Beach accent wall into this:

She really did a lovely job. THANK YOU SO MUCH AUNT SUZIE!


Thursday, March 08, 2007

do-over time

I'll admit it: I was a BIG Woolie fan. For years, I've raved about it as a great faux finishing tool. We used it in our living room in our condo with great success ...


We loved it. So when we were finishing off the upstairs in Humphrey House, and Jason was feeling our bedroom was too white, we decided to accent one wall using our beloved Woolie.

EWW GRODY!!!! What happened? This looks like green moss covering our walls. Oh, I was so disappointed that I threw the whole Woolie shebang in the garbage. And now we have to repaint!!!! DOWN WITH THE WOOLIE. At least when you're as tired as us ...


Wednesday, March 07, 2007

My walls are singing ...


The walls are alive
with the color of swiss coffee (ahhhhh)
with brights they have brung
from a thousand beers ......
so pretty!!!!!! it's lovely! it's ...
SWISS COFFEE!

Tuesday, November 29, 2005

The Finish Line (level 1)

After a few months of detours, lost paths, and pit stops we have finally reached our first real milestone. Something is finally done. Actually, an entire level of our house!

The basement has reached the final stage (sans decorating), and we even have the official approval inspection from the city building inspector! Wee!!! There was a slight problem when the electrical inspector noticed that there was no grounding wire jumping over the water meter, but realizing that we're doing the work ourselves, he gave us a stiff lecture and an approval. We have it fixed now though [picture]

Sara helped Jen again by putting on an extra coat of paint. Jay had to come back from thanksgiving early to finish off various trim details, but the extra work over the weekend has paid off. The place looks sharp, except where the floor level varied so much that there are gaping crevices under the trim. Not the levelest floor in America, but we'll take it! Just caulk it! (I'm kidding, mark :)

We've got our movers coming in today to bring back our furniture that has been forgotten since we left our condo in July.

View final pictures (pre-furniture)

Thursday, October 13, 2005

Trimming Out

Where is the water pipe?
Turns out the pipe from the water shut off in our yard to the water main was made of lead (gotta love 100 year old construction!) so the village came out and replaced that for us while we still had a gaping hole in our front yard. They're still repaving the street, but at least our water will be safer now.

On the inside, we've been busy working to clean up after we had mass graves dug inside a room we thought was done. Now, we're really almost done with it. Jen's studio may have a 1 inch water pipe running through it, but we've tried to mask it by painting it the same color as the walls. Last weekend was full of finish / trim work. For both this room and the music studio we:

1. Got foam-backed berber carpet and cut to fit in each room, and then secured it to the concrete with some super-sticky adhesive. We were able to do this without any seams since both rooms were relatively small. The floors feel so much better already!

Music studio2. Installed 90% of the trim needed for both rooms. Jen's studio still needs a bit around the interior glass block window, and the music studio needs some capping pieces at the top of the wainscotting. This made the room look so much brighter, and a healthy contrast to the deep purple walls.

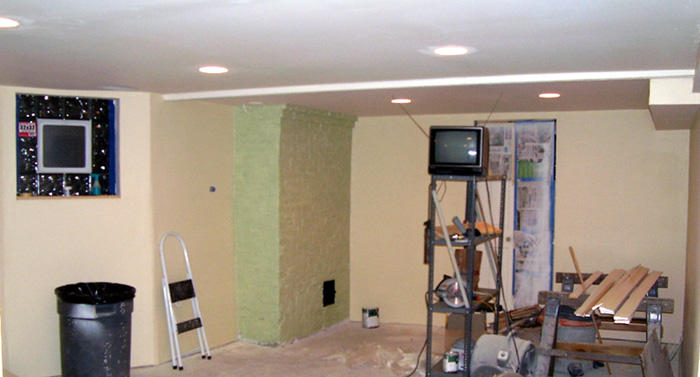
3. Earlier in the week, Sara came by on her day off and painted the big family room, and Jen finished off the fireplace on Saturday. This room is incredibly bright and spacious and is really impressive to walk into now. A little trim and carpet in here, and we can cross another room off the list. All the hard work and planning is finally paying off!

Basement family room

Sunday, May 01, 2005

Dreams of Bungalow Color Schemes

Photoshop knowledge, in the wrong hands, can be a very dangerous thing. But we only use our powers for good, at least today. And so ....


Been playing with color schemes lately, can't you tell? Wanna see more? Click Here ...

Energy level is running low, so brief update: mucho thanks to Scott & Julie & Sandy & Mike & Sara for all their hard work this past weekend. We all came together to totally turn Humphrey House into the best haunted house ever! Too bad Halloween is so far away ... maybe we'll just have to bring a lil punkin fun to Chi-town a wee bit early this year . ... say Memorial Day?

More to come, and pix too!

"Om was yesterday's mantra. Today is more along the lines of 'grrrr ..." :) - Gutted: Down to the Studs Of My House, My Marriage, My Entire Life, by Lawrence LaRose