
One of the problems with living in a home during substantial remodeling is the sometimes piecemeal approach you must take to projects out of shear necessity and sanity. Case in point: our stairs from the second floor into the family room / kitchen.
This space was unfinished and open for a long time and was often a ground zero dividing line between living areas and work areas for different phases of our remodeling. And not being very experienced in trim carpentry, we never were quite sure exactly how to complete the transition. But after finally consulting with several people (who insisted it was much easier than we were making it out to be), we developed a sort of hybrid solution of various ideas. First of all, instead of having the handrail terminate directly into the wood jamb and center column, Jay decided to use some extra plinth blocks he had to make a decorative terminal for the handrail, shown in the image here.
We still have plans to do a craftsman-ish trim design on the center column, which will focus on three raised pieces of oak trim, and to echo that triple motif, we decided to arrange the stair banisters in groups of three. Instead of the typical turned oak spindles, we wanted to keep the straight lines of the era and went with 1" rectangular spindles, shown here as we waited for the two coats of "Rosewood" stain to dry. Speaking of this stain color, it took a lot of experimenting to find a stain that best matched the vintage 1912 trim in the house, and we even mixed different stains together. But ultimately, the rosewood came to be the closest match and after a couple of coats, gave the depth and color that we wanted. Best of all, this is a water-based stain (not oil-based) so cleanup and any mistakes were a breeze to handle, and there weren't any noxious fumes.
Anyway, back to our stairs dilemma. While it was obvious that the stairway spindles would attach to the bottom of the handrail, we struggled with how to finish the bottoms. Should we create a bottom rail parallel to the top handrail that would be slightly above the stairs themselves, or should we carry the spindles all the way to the treads of the stairs? We decided to go with the latter.
Monday, December 15, 2008
Solving the Stairway Dilemma

Wednesday, December 10, 2008
Stairway Plant Shelves with an Arts-and-Crafts Touch
Ever since we "finished" our second floor in 2007, there have been a few punchlist items we've been meaning to take care of. One of these was to trim off the sides of our U-shaped stairwell with some finished shelving.
When we expanded the stairs from the original bungalow winder stairs into a standard-width staircase and landing, we had to demolish the old "cat walk" balcony that wrapped around the stairs. However, this left some large, 18" deep shelves flanking both sides of the landing in the middle of the stairwell. These would make great plant shelves as the windows in the stairwell are the only ones that truly face south and receive sun all year round.
While wandering through the trim aisle on a recent trip to the hardware store, we stumbled across this nice 2" oak trim with a very arts-and-crafts floral design cut into the oak. It seemed like the perfect trim piece for our plant shelves! It may be hard to tell from the photo above, but the trim piece has a nice floral vine pattern that weaves along the whole length of the long shelf. Of course, we stained these shelves to match the rest of the new trimwork in our stairs and kitchen area, using a couple coats of a nice low-VOC water-based stain "Rosewood Red", which matches the original trim in Humprey House quite well.
Here's the finsihed plant shelf, already home to our collection of plants and Jen's herbs just in time for winter!
Wednesday, February 20, 2008
Lost Post: Repurposed gynasium floors
A while back, Jen mentioned that our hardwood floor installers filled the large gaping hole left after we removed the old kitchen wall by patching it in with some old gym floors. This might have left you wondering, "how do you know that?"
Well, after finally downloading some photos from our camera, we have the documented proof of this interesting way of using recycled building materials. Here is the patch where the original kitchen/bedroom wall used to be located (my, how things have changed):
And another, closer view showing the patched floors:
This final photo shows a bit of floor that needed to be patched as a result of widening the stairs, and leaving a nice open area to allow light from the stairwell to flood the family room / kitchen. You can really see some of the painted gym floor logo on this one:
As odd of a choice as it may seem, once the patches were sanded, the new maple blended in with the old maple pretty well. I just might have to grab the b-ball out of the garage and see if some of the talent that once graced that maple rubs off onto me. :-)
Monday, March 19, 2007

Tuesday, August 30, 2005
Stairs as promised
As promised, we have some photos to share of our wonderful new stairs, that now allow even Scott to walk throughout the house without worrying about head clearance! Seriously, they have really opened up the house a lot, and are quite spacious! Jay's grandpa Don did all the design, layout, and led the construction. Along the way Jay, his brother Rob pitched in. And Kenny came up TWICE and took time off his vacation to help out, making several trips to the hardware store, adding new doors and all sorts of miscellaneous things. When it was all said and done, it added up to give us this:
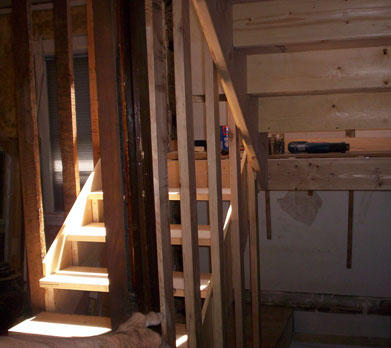 The photo above was taken from the top of the second floor. In the photo at left, you can see we ended up getting a lot more light in the house as well - The windows above the stairs are the only ones we have that face south with full sun all day long. Just look how the sunlight floods through the stairs going up! And the stairs going down to the basement (on the right) will have loads of headroom, and an access door for storage under the other set of stairs.
Now we can start planning for upstairs as we work on finishing off the basement. Thanks to everyone for their help, but especially Grandpa! :) Now we just need to do something nice to thank him for his hard work. Any creative ideas are welcome :)
Wednesday, August 10, 2005
It's been awhile ...
... and we've accomplished quite a bit! We were able to manage to go on an actual vacation - albeit an abbreviated one - and spend some time not thinking about the house (too much, anyway). Then we came home a few days earlier and got to work in earnest.
Most people know the basement has been a bit of a BYOB project - that is, Build Your Own Bedroom (Scott's got his ready!) But it's really starting to near completion now. I spent the other day painting the office in the basement a mixture of yellow and peach. It looks pretty cool. I also finished the ceiling in the b/room, and Jason and I picked out colors for the main room. Right now, we're just waiting for the stairs to get finished (hopefully by next week, Grandpa Duck is volunteering his time and energy out of the sweetness of his heart) and once that's done, we can get moving on the basement - FULL SPEED AHEAD.
Jason's grandfather has been busy like a bee on our stairwell. He and Jason tore out the stairs completely (photos to come in next post) and designed the new ones. My dad took a day off of his own vacation to spend helping them get started on the actual construction. Jason's brother also has come by to lend a hand. Muchas gracias!
That's all for now. Will be posting some of the more acrobatic photos this weekend. Ever wanted to see Jason walk a tightrope?
Monday, January 03, 2005
Plans (cont.)
"Now that we have covered Kitchen remodeling, what other grand plans do the two of you have on your new house?"
Glad you asked!
We really miss having two bathrooms, and with four bedrooms (even three if we remove one to expand the kitchen), we really need to get another one in there. Plus, we don't really feel like going up and down two flights of stairs for each load of laundry.
So we're planning to put a 13 foot shed dormer on the north end of the house, to feature a new bathroom. Good thing Jay's mom is a bath designer and his stepdad is a plumber! Talk about a match for the ages :) She is presently furiously transcribing the vision into reality on the drafting table so Jay can take blueprints over to Village Hall tomorrow and submit plans for the permits. Thanks so much Vivian!!
Anyway, the photos are to big for the blog, but here are links to our plans (will open in new a new window).
View Existing First Floor
View Existing Second Floor
View Revised Second Floor
New Bathroom Plan:
Kinda rough, but at least it gives you something to go on :)
Did you see those Winder stairs? Man those things are scary going down - especially if you're carrying anything and can't see below you.
We'd like to try and expand those out and make a landing as shown in the Proposed drawing, but they may not meet the 36" width required by code. We'll have to see on that.


 Posts
Posts


Anyway, although it was incredibly labor and time intensive for just a few square feet, we're very pleased with how the stairwell turned out. When its warm again, we plan to create some detail work on the center column that will echo the triple-pattern of the stair banisters. The plan is to have three 1-inch vertical oak trim pieces hanging from a horizontal band that wraps around the column, to lend the room more of a craftsman feel.