Tuesday, December 28, 2010

Sealing Out the Drafts

Winter has arrived yet again, and our struggles to maintain an efficient - and more importantly, comfortable - 100-year old home continue. This is a battle I wage with elements every year as things turn cold.

This year, I've become increasingly knowledgeable about a little thing that is hard to see and really adds up - air. Or more specifically, air leakage, an important aspect of green building. Although we performed a blower door test over a year ago, there continue to be opportunities to improve the air leakage in our home.

So after learning some building science, its useful to know that in addition to heat rising, the upper levels of a home are constantly under more pressure. Heat and air both rise, creating a chimney effect in a mult-level home. This static pressure causes air to want to find its way out of the house, particularly in second floor converted attic like we have.

With this in mind, I recently went around our second floor to address these air leakage issues. The largest losses on the second floor are in all the ceiling penetrations. The recessed lighting cans and built-in speakers have been great and provided clear headroom, but when installing them we could have been a bit more careful. The biggest regret I have is buying the big-box special recessed lighting housings. We purchased the insulation contact (IC) rated housings, which were important so insulation could come right up alongside the lights. However, had I spent a dollar or so more on each light housing, we could have had air-tight insulation contact (ICAT) housings. As this article explains, regular recessed lights allow for a ton of air leakage. Note to self: when buying these in the future, hold up to the light in the store. If light comes through, so will air!

Oh well, fortunately, many of our recessed lights in the attic have an air-tight shower trim kit. We liked them because they have a flat, not-quite-interrupted surface. Now, I'm glad they help fend off air leakage too. Additionally, I recently took to time to caulk between the drywall and the metal can to eliminate further leakage around the cans.


While I was messing with the ceiling, I also took down the smoke detectors (we have 3 upstairs). Underneath one of the smoke detectors, there was a significant amont of dust - enough to form a ring around the collar! I knew it would take more than Wisk to make this ring go away. Dusty signs like this - after just two years since installation - is a tell-tale sign that there is some major air leakage and heat loss ocurring here.


After removing the smoke detector mounting bracket, I pulled out one of my new favorite stocking stuffers, Dap Latex Foam Sealant, a great easy-cleanup spray foam that is water-based instead of oil-based (like Great Stuff).


I also used the spray foam around some of the air return ducts that weren't sealed to the drywall, and plugged a few other holes with what remained in the can.

After all of this, I think our second floor bedrooms in the converted attic space will be more comfortable this year. And, this may be a surprise, but this will likely make the basement more comfortable as well. Why? Well what happens in the basement has everything to do with what happens in the attic.


It goes back to that static pressure concept - when air is lost through the attic,
it comes in at a lower level such as a basement or, even worse, an attached garage (think of all the chemicals and fumes stored in a garage, and how that air might come in if the attached garage is the weakest link in the air barrier). We are fortunate to have a detached garage, so we don't worry about this. However, if we make it harder for that static pressure to force air up through the attic, it means less air will be pulled in from the basement, keeping that a bit cozier and healthier too.


All in all, it took more time to write about this than it did to actually seal up some of these holes, so I'm hopeful we'll get a more comfortable home with this small investment. With the Chicago winter underway, every little bit of comfort and energy savings helps Humphrey House be a happier and greener home!

Wednesday, October 27, 2010

Vision of the Scarecrow

Neighbors and passer-by stare in wonder and awe as they pass our creepy yard, and the days until Halloween tick down.

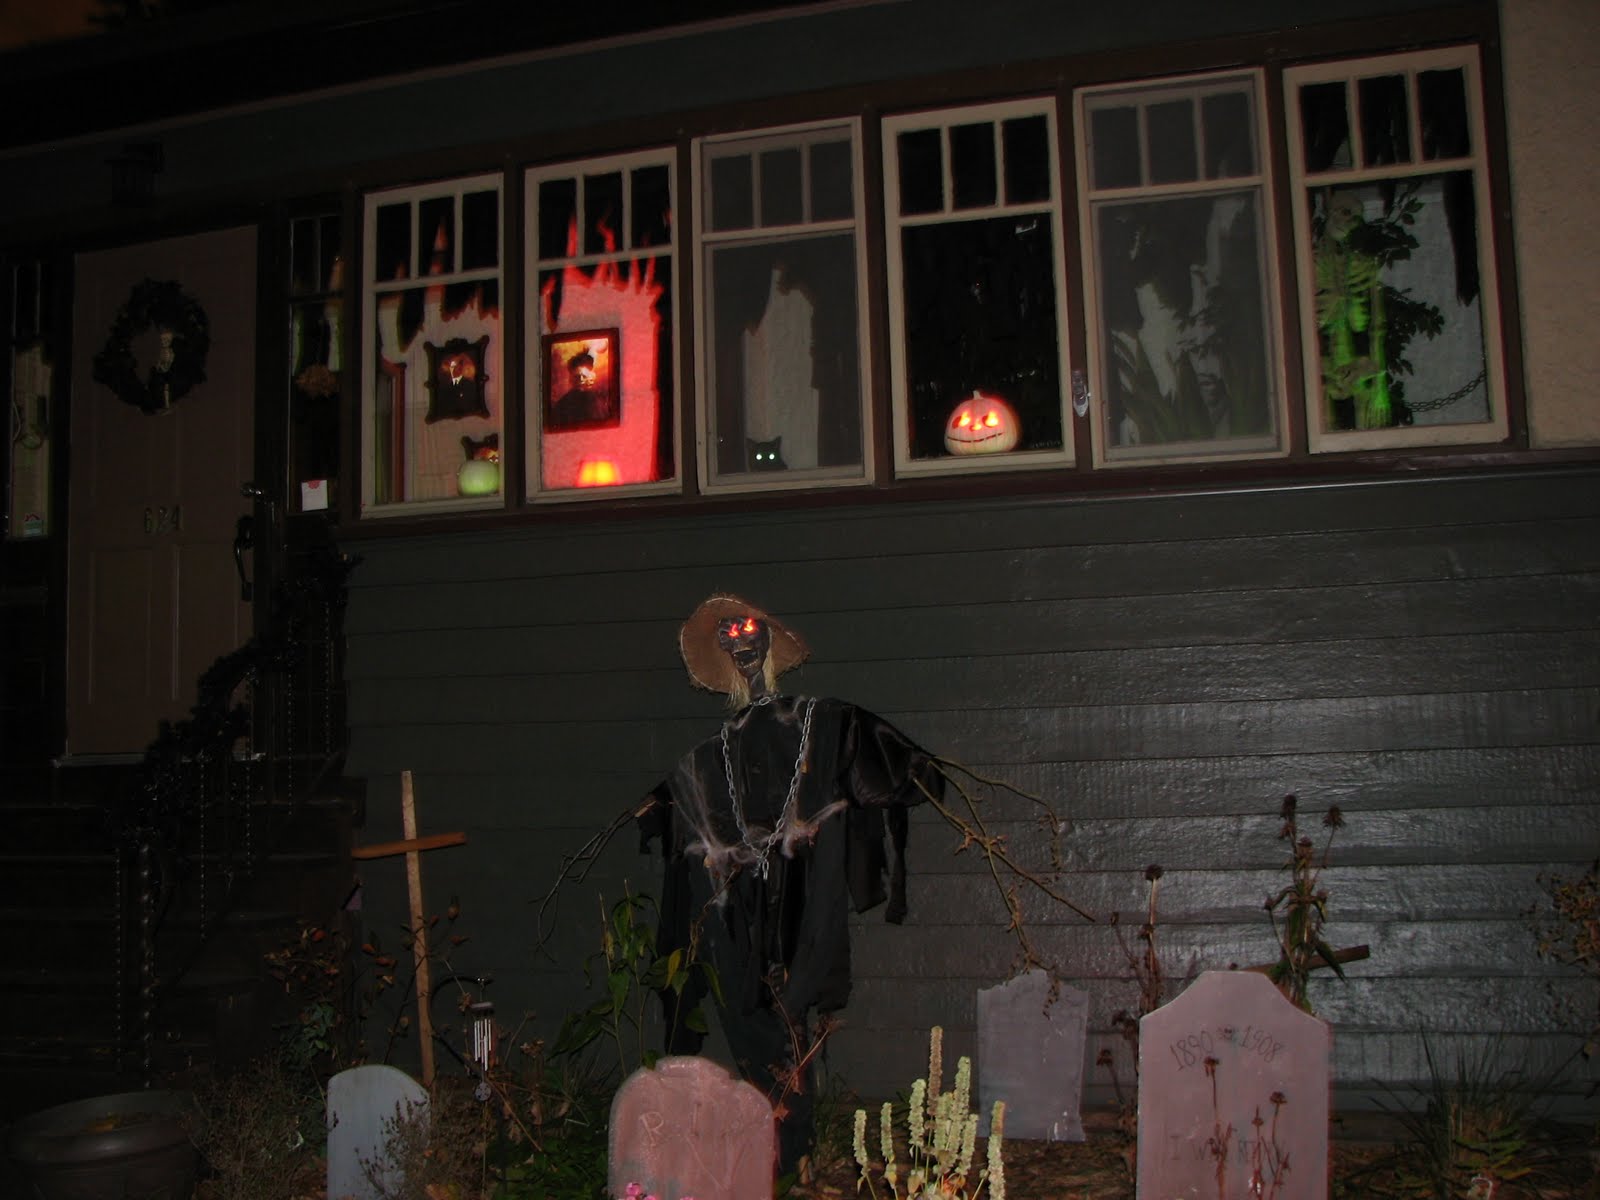
Our good friend Mark recently helped add a crowning touch to the Scarecrow that we fashioned for the graveyard, bringing him to life in a new way. One of Mark's many talents is repairing consumer electronics, and when I told him about the scarecrow and the plans we had, he offered to help out in a small way by stringing together a few spare LED lights he had. All I had to do was figure out a way to insert them.

Fortunately, the scarecrow's construction is quite modular and easy to disassemble. When creating him, I was trying to get as sturdy as possible without permanently affixing things so that it would be difficult to store the scarecrow. One of the nice things is that with the plastic skull as a base (see the beginning), I could drill eyeball holes easily enough to glue in the LED lights. The head is supported by a 1" PVC pipe so I could run the wires through this, down into the body where the wire could be hidden by the creature's "clothes".

Mark gave me a nice long wire I was able to snake along and tuck into the crawlspace under our front porch, where there is some weather-protected electrical access. By taking an old 3.0 volt transformer, which the LEDs run off, I could simply plug this in and voila! Our scarecrow suddenly has beady red eyes!

This really brings it to life. I can just hear the Tales from the crypt theme music, and the Cryptkeeper laugh, "What are you lookin at??"


Like what we're doing here? if you have a Facebook account, cast a vote for us at a halloween contest being sponsored by a local real estate firm.

Tuesday, October 26, 2010

Custom Graveyard Monuments

This year our annual haunting of Humphrey House are growing a bit out of control. I blame the book How To Haunt Your House, Jen thinks its because I don't like work as much play. Whatever the reason, the scary props are growing.

Besides the scarecrow and the graveyard fence, we also decided to take some 2" foam board and make custom grave markers for our front yard. The store bought tombstones are okay and we always steered clear of cheezy ones, but ultimately the just look so, well... fake. To liven things up, we were inspired to create some of our own tombstones.

Armed with a wire heat gun, I sculpted the remains of some 2" rigid foam insulation into various custom tombstones, which we then embellished by melting in designs with a soldering iron (note: use LOTS of ventilation!). Jen came up with all kinds of cool fonts and designs. Next up was coloring the foam board.

Mixing the same colors used on the scarecrow, we came up with a nice gray that I blended with some old drywall compound. This was used to cover the sides and back of the tombstones. I first tried this on the front of one tombstone (the "Crane" one below), but quickly remembered that this material is meant to fill in holes and cracks (duh!). It filled in the front details far too much. But on the sides and back, it gives the tombstones much more weight and appearance of somthing sculpted out of stone. A regular paint mix (no drywall compound) on the front faces made the tombstones complete.

After drying, we used black paint for any recessed details and used a nice iridescent paint we had left over (from our condo 6 years ago!) to highlight certain aspects. Here are the results:

Bill Compton's tombstone.. May he rest in peace for all eternity.

The Van Tassel grave marker (inspired by Tim Burton's Sleepy Hollow) is one of my favorites. Jen's skull-head design and side markers turned out great with the iridescent paint.


This last marker is a bit unique. I had to get Green into this display somehow, so I figured I'd make more of a monument as opposed to a tombstone, for the green homes rating system called LEED that I work with. There are five areas of the rating system that are represented by icons:

  • Sustainable Sites (SS) represented by the leaf
  • Water Efficiency (WE), shown by the drop
  • Energy and Atmosphere, indicated by the asterisk
  • Indoor Air Quality (IQ), shown by the waves
  • Materials and Resources (MR) shown by the reduce, reuse, recycle triangle.
It's a bit corny, and I know I'm taking my work home with me here, but I figured I was investing the time so might as well make it a bit personal.

Anyway, once we had the props complete, we staked them out in the yard with insulation hangers (more leftover building materials!) and a piece of lathe behind each one for support.


One of the nice things about all this work for Halloween is that its done using materials that we already had laying around from the various construction projects, giving the surplus material a new, and haunting, life. Just wait until we show you the hologram ghost we're making!

Monday, October 25, 2010

A Grave Yard Indeed

This year we learned that tearing out the grass in the front yard makes for a delightfully creepy graveyard in preparation for All Hallow's Eve. With leaves starting to fall and make their way around the landscaping, we simply needed to put up our tombstones to start out with a ghostly yard. Some flowers were still blooming, making an excellent offering for a tombstone or two.


But with concerns about the rampant number of children that visit our block on Halloween, we decided some protection might be in order. Maybe we could erect a fence around our tiny yard to give it a more formal feel. We thought of doing this with PVC pipe but decided for a more recycled look. I still had a pile of lathe from the plaster walls we took down when we redid the kitchen. It didn't take to long to find the longer pieces, strip the nails, and erect a graveyard fence. Jen's brilliant touch was wrapping the top in some imitation barbed wire we picked up on clearance last November.

There was a bit still lacking though, so we decided to make some of our own tombstones. More on that in a later post!

Tuesday, October 12, 2010

The Scarecrow Comes Alive

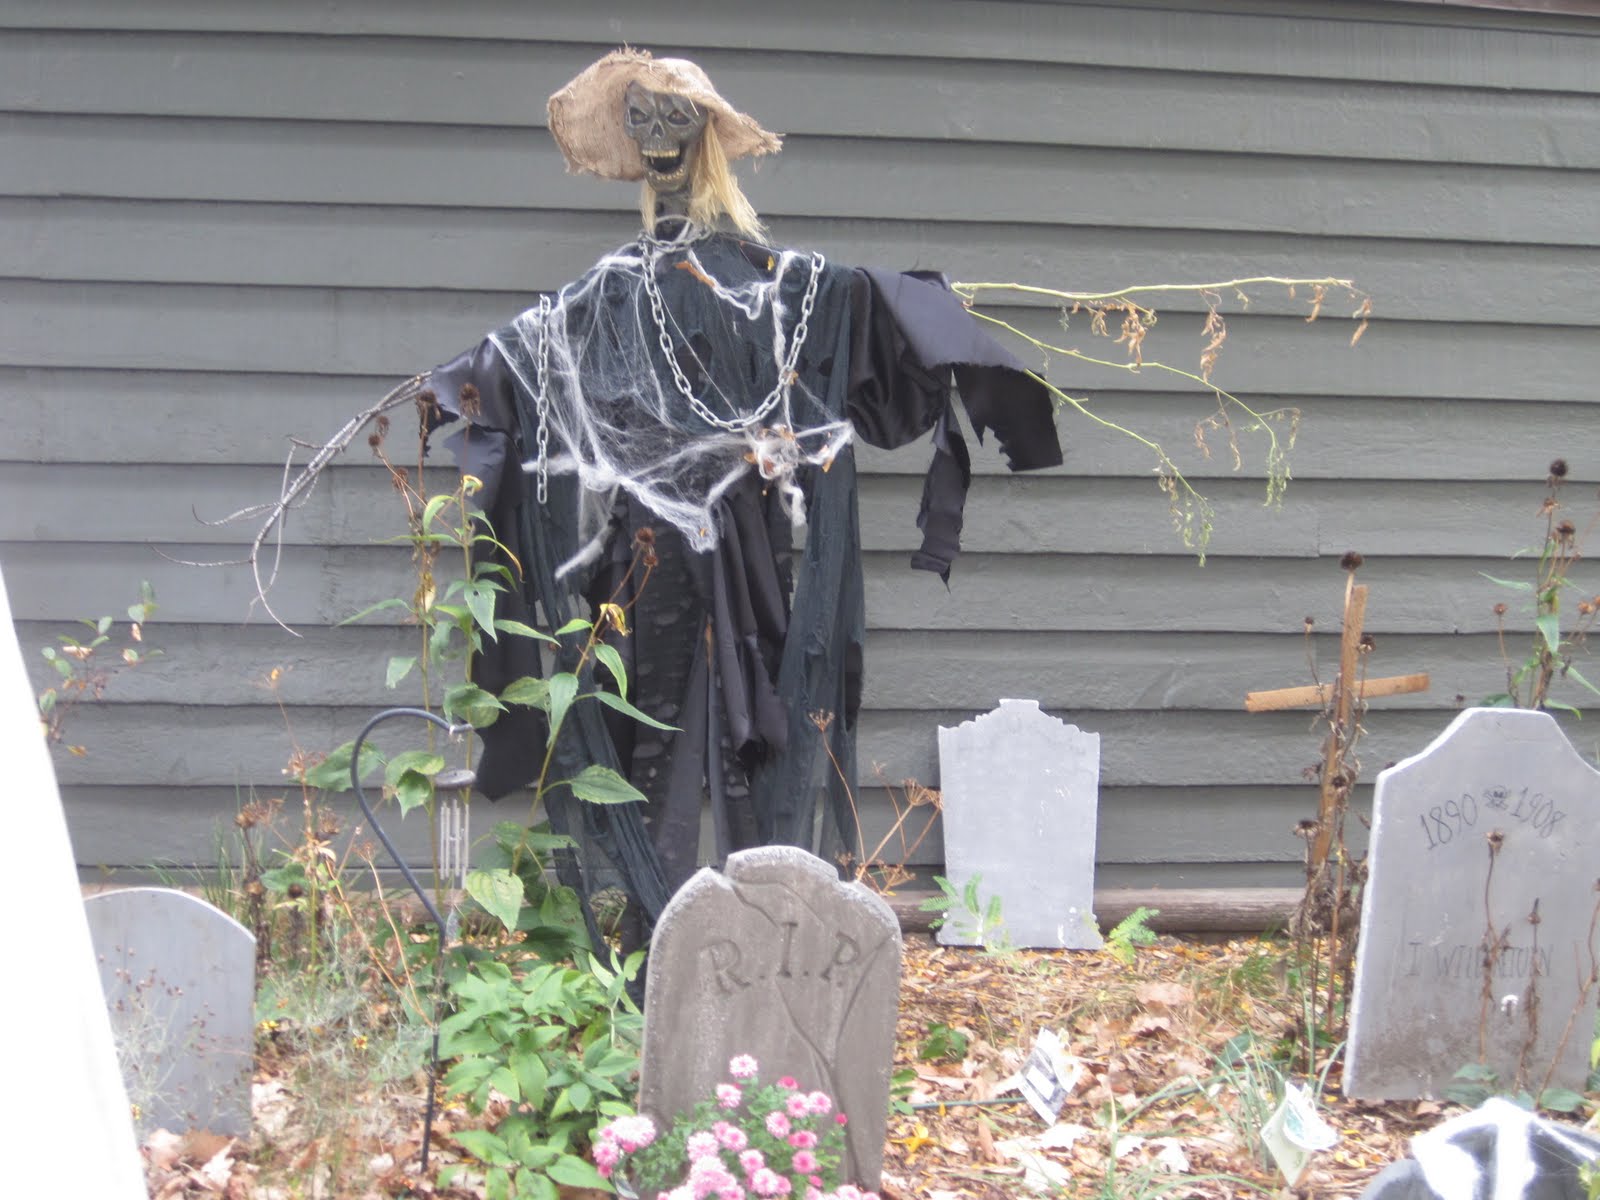
The tortured soul that will oversee the front yard cemetery has slowly emerged and come to life. Our inspiration is the book, How To Haunt Your House.

Once the paper mache and mod podge applied to the skull had dried, we found some gallons of Oops paint we picked up for $5 a long time ago. This turned out to complement the yellows from the glue quite nicely.

A layer of brown paint wiped on casually with a foam brush, and then some strategic dark purple paint gives him a nice bruised-flesh appearance. A few highlights with an off-white around the eyes, nose, and sinew completes the look. The "neck" was a pants legging from an old pair of PJs that got the same paint treatment.

Next, I glued various rope twine pieces to the top of the head to give him some "hair". It appears a bit too much like dreadlocks so I'll likely separate these out for a more tufted appearance.

After cutting a hole in the skull just large enough for a 1/2" PVC pipe, an old 6-foot bamboo pole lying in the garage serves as a perfect stake for our scary beast. The PVC slides right on top, so I found a scrap plywood piece that could be the "chest" to which to attach the pole and a couple of "arms" fashioned from 1x2 cutoffs. I'm glad we've kept all kinds of spare lumber in the garage for just these types of events. A couple of electric conduit fasteners were just the right size to attach the bamboo pole (and allow for later disassembly).


An old burlap sack was hastily turned into a hat (reinforced with electrical wire and loosely sewn with string dyed black). Then, taking some scrap black fabric we had leftover and a spare chain, I dressed the scarecrow for the first time.


There are a few tweaks to make - puff out the body a bit, and shorten the neck, but you really get the idea here. I can't wait to see him in place in the front yard. Bwah ha ha!