
On Friday morning, a piercing scream woke me better than any alarm ever could. I soon discovered that Jen was rudely informed by our plumbing system that our hot water heater had given out and was no longer working. Unfortunately, this was while taking a shower. Not the best way to start the morning.
So the water heater limps on, and we have hot water again. But the whole event got me thinking about replacing our 14 year old water heater when we redo the rest of the plumbing in the house. I've heard about tankless water heaters for awhile. They've become standard in green building technology. Low water usage, no standby heat loss (you only heat water as you use it, "on-demand", instead of constantly heating a 50 gallon tank of water all the time), and very small space requirements. The technology has been used elsewhere in the world where water is a premium (Europe, Japan), but has only recently caught on in the US.
An excellent overview of how tankless water heaters work is provided on the Takagi website, as well as other providers (Bosch, Rinnai, Paloma). Basically, you never run out of hot water... the tank can always heat water on the fly. The biggest disadvantage is that you need to get a large (read: expensive) tankless heater if you expect to have more than 1 "major application" at a time. This means 2 showers or 1 shower + dishwasher. Most can support 1 shower + a sink. But they last a LONG time, manufactures claim 20+ years. Some people say even longer.
The only other bad thing is the initial cost. It's about twice as much as a traditional tank heater. For a model that provides for 2 major applications, it is about $1000 (they also need special ventilation too). But part of this cost can be offset since because they are about 85% efficient, they qualify for a $300 energy credit for next year's taxes.
All said and done, I think the pros may outweigh the cons. In addition to the cool sustainability points for being green (and saving greenbacks in terms of nat. gas costs), I really like the space efficiency aspects. We'll have to do more investigation on these tankless units. Any feedback or insight is welcome!
Tuesday, May 16, 2006
Going Tankless

Monday, May 15, 2006
Time keeps on slippin, slippin, slippin, into the future .....
We finally sat down and did a schedule for the upstairs. The finish date is soooo far away. But at least we're being realistic!
Remember, this is ONLY for the upstairs. I am determined to start the kitchen before the end of the year.
I can't believe I know what we're doing every weekend through the end of October.
We did build a couple of spare weekends in, I think. Not a lot. Erika better have that baby on schedule, that is all I have to say! :)
MAY
May 20 & 21: Siding & Painting Garage
May 27 & 29: Finish Upstairs Demo (sat Frank Tribes show)
JUNE
June 3 & 4: Final Dormer Preparations
June 5-9: DORMER HIRED WORK - framing, cut roof, install skylights/tubes
June 12-26: DORMER HIRED WORK - install flooring, repair roofing
June 17 & 18: Erika's Due Date
June 24 & 25: Nici? And Plumbing .... (John)
JULY
July 1 & 2: Interior Framing for dormer
July 7?: install Heating (Chris)
July 10?: electrical upstairs (Fred)
July 15 & 16: Insulation
July 22 & 23: Drywall
July 29 & 30: Drywall
AUGUST
August 5, 6 & 7: Drywall
vacation!
August 19 & 20: Tile
August 26 & 27: Tile
SEPTEMBER
September 9 & 10: Finish Plumbing, Muddy Buddy Weekend (Jen & Scott to kick some butt)
September 16 & 17: Paint (at long last!)
September 23 & 24: Finish electrical
September 30 & October 1: Flooring
OCTOBER
October 7 & 8: Trim, Frank Lloyd Wright Races
October 14 & 15: Finish the trim!
October 18: We move in, our third anniversary
October 21: Upstairs Halloween Party!
Tuesday, May 02, 2006
Starting off on the wrong (left) foot
While awaiting estimates from contractors to frame our dormer, we've begun to take advantage of the still-cool weather to work with the unpleasant work of demolition. Actually, this was planned for a couple of weeks, but we first had to relocate many of the things being stored in our attic. I forgot how much stuff we had up there, so we didn't really get started until this past weekend.
Where would we be without Scott and Julie? They came over Saturday afternoon to lend a hand... and ended up contributing a foot! A foot, you say? Yes indeed, a foot. And a leg too!
Let me explain. Shortly after their arrival, Jen and Julie went to pick up some supplies, while Scott and I removed the carpeting stored up there. After about 5 minutes, we were almost done with this task. On the final trip, we walked across the floor, and suddenly I heard a bursting crash behind me. When I turned around, Scott was about 36 inches shorter, as his left foot had found one of the spaces without any subflooring, and gone straight through our dining room ceiling! Fortunately the poor guy managed to come up unscathed, which is no small feat. Also fortunate was that this did not happen 10 minutes earlier, when Julie was sitting in the dining room closely under the soon-to-be extra skylight.
We actually covered the whole with an extra piece of drywall and cleaned up before they returned from the store. I know, i know. I should have taken a photo earlier. Oh well - maybe we can recreate it.
Honestly, I figured that sooner or later, someone (most likely me) was going to poke a hole in the ceiling since we have to redo the entire floor up there, so it's probably a good thing we popped the cherry and got it out of the way. Poor Scott felt pretty badly about the whole thing though.
I think he worked extra hard once we got past the unintended demolition and started working on parts of the second floor we actually planned to demo. :)
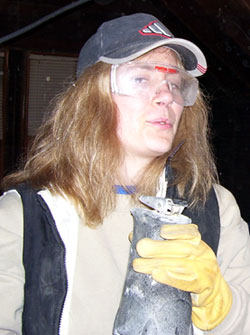
We managed to get a fair amount accomplished once we covered the floor upstairs :) What will be the master bedroom is completely gutted to the point we need it, except for the floors. Julie even ripped into the wall with a sawzall to make room for some built-in storage! So by the end of the day, we not only increased the ventilation between the first and second floors, but also got some things done!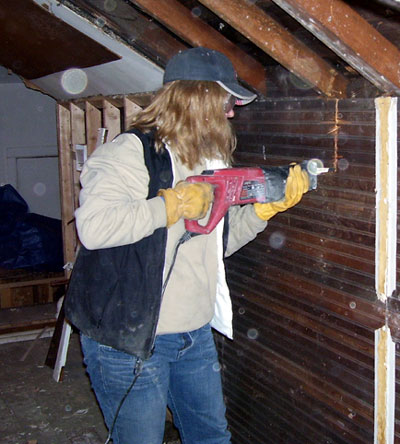
Thursday, April 20, 2006
Now that's a right proper back porch ....
Happy with no teeth
Happy here in hibernation
Slurpin' on a peach
Starin' at the situation
Kitty at my foot
Meowin out a conversation
Rocking back and forth
That's my only destination
- from "Back Porch" by Presidents of the United States of America
That's right, folks. Since as far as the top floor goes we're kinda stalled out like the old zeldamobile at a four way stop until we get some contractor quotes, we decided to look for other ways to occupy our time.
RING RING RING. 9am Saturday morning. "Hey guys, it's Julie. You got anything I can smash? I'm in a smashy mood."
I eye the back porch through the grogginess of half-awaketown, and say "Sure. Bring a hammer."
Viola .... DESTRUCTION, properly sanctified by the fact that it's a 100+ year old porch in need of some serious attention. Like, now. So thanks, Julie, for kicking the porch screen's ass into oblivion. That, and for the Brokeback Mountain. :)
While it's still a far cry from finished, at least we got it started!!!

Tuesday, April 18, 2006
Meeting Approval
Yes! After a year long process (okay, so it wasn't honestly top priority all the time), we have finally put together a set of plans for our attic remodeling, dormer addition, and bathroom that has met the excruciatingly detailed criteria for our local building department, and received... a PASS!
Yes, they stamped the heck out of the plans Jay drafted up, with multiple large stamps for inspections, rules for revisions, and whether the plans are a job copy or village copy. Unfortunately, I don't have any photos of these happy black & white drawings with red stamp ink all over, as they will hold them until we get the actual permits, but still! Approved plans!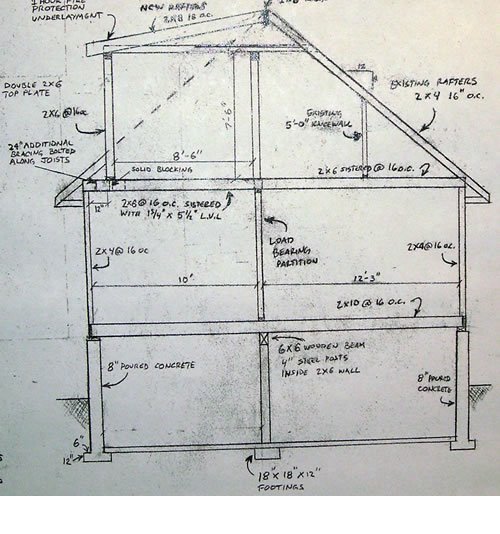
I've put a photo of one part of the plans here (click for a bigger view). This is mostly structural drawing showing how the new shed dormer roof (upper-left) will be supported by the rest of the building. Once we get the job copy plans, I'll take more photos of the overhead view.
So what's next? Well, knowing that we move at much slower pace than professionals, we're investigating subcontracting certain components of the project. Here are the different phases we'll need:
1. Demolition (friends always seem to love this part). Substeps include, floor, ceilings, and exterior
2. New floors. Not just subflooring, but all of our floor joists need to be sister-braced (doubled-up) with structural LVL lumber, since the existing 2x6 joists are so inadequate.
3. Exterior work. cutting open the roof, framing the dormer, adding skylights, roofing it, siding it.
4. Interior framing. New partition walls throughout
5. Insulating.
6. Plumbing. John already did the laundry room, but we're adding a master bath so...
7. Electrical
8. HVAC
9. Drywall
10. Painting and Trim. This is what Jen loves most. In fact, it's probably what is mostly on her mind when she thinks about the upstairs :)
So, a wieldy project, but its warming up, the plans are set in stone, and its time to get cracking!

 Posts
Posts


